It’s something you just don’t expect. You’re happily driving your truck on the way to work, when suddenly there’s a very loud pop followed by the loudest clatter you’ve ever heard coming out of your engine. I really thought I’d blown a head gasket, but the noise was too loud and the engine continued to run, albeit very noisily.
After checking under the hood for a broken fan blade, or dangling alternator, I opted to try to get the truck home. Still driveable, but extremely noisy, the truck was able to limp along at 10mph. Neighbors rushed to their windows to see what the racket was. Mothers with small children covered their ears.
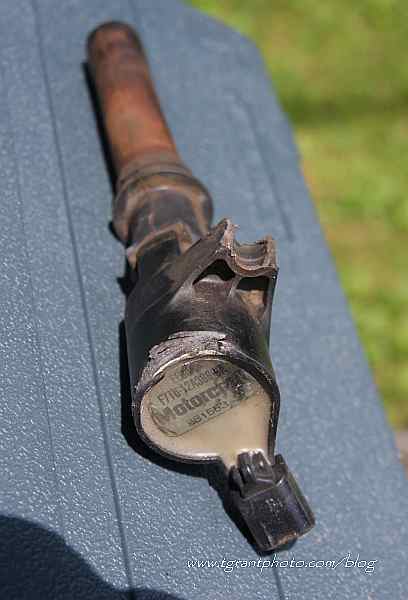
Finally back in Dry Dock, closer inspection revealed that a spark plug had been ejected from the Ford Triton V-10 cylinder head. In the process it had ripped the plug coil from its mount. At first it seemed like an easy thing to fix. The plug, I thought, had wiggled its way out. “This should be a simple matter of screwing it back in” I said to myself. Not so!
As it turns out, I was just one of many thousands of Ford owners who’d been unlucky enough to own one of these engines. According to articles online, it seems there’s just not enough threads in the aluminum head to keep the plugs secure. After a time, they loosen up, vibrating up and down, until they wear through the threads, finally ejecting themselves under high pressure from the cylinder.
It could have been prevented, I suppose. Two weeks prior I’d heard a slight ticking noise under the hood. In retrospect, that was probably the plug doing its Dance of Death as it rattled and wore away the threads. The day the plug ejected, there were strange puffing noises, sounding much like a small exhaust leak. That happened just ten minutes before the plug went AWOL.
With only 37,000 miles on my Ford Triton engine, I felt violated. Most mechanics told me the engine block had to be removed, a near $4000 job. Online articles describe how Ford disavows any responsibility, citing customer torquing error when installing spark plugs. All this was sickening news that sat like a cold lump in my gullet.
But there was a light at the end of the tunnel. While researching the problem online, I ran across www.denlorstools.com. They carry a special tool, the CalVan 38900, that could, they reassured, provide a simple way to repair the thread damage without removing the engine. This was exactly what I needed to hear! Dennis from denlorstools.com gave me much needed support, answering my questions, quickly and efficiently. Within the hour I placed my order for the $256 kit and I began my plan of attack on the Triton V-10.
Be forewarned, even though you’ll be doing this job yourself, this is still a costly repair. There’s additional tools and parts that you’ll need, bringing the total repair cost to about $500. But that’s still much cheaper, and time-efficient, than leaving your truck at a repair shop to have the engine removed! Plus, now that you’re the proud owner of the CalVan 38900 kit, you’ll be armed and ready for any future spark plug catastrophes!
In addition to a socket set and regular hand tools you might already have, you’ll need:
a) a video borescope $99 from www.thinkgeek.com
b) a good variable speed 3/8″ air ratchet $60 to $130
c) an air nozzle attachment for your compressor $7
d) J-B weld $5
e) a 13 watt fluorescent stick light $12
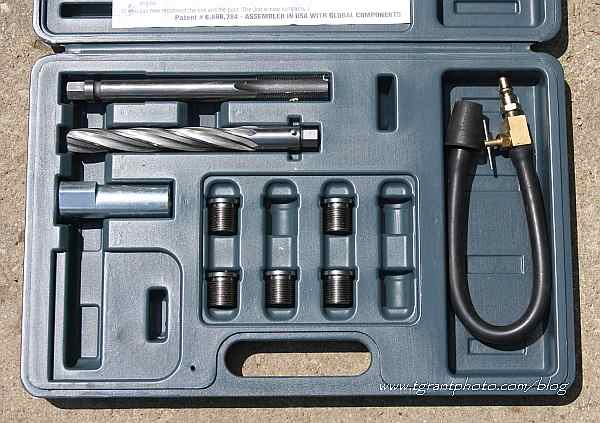
The CalVan 38900 kit comes with several custom made tools; a special insert, a drill bit, tap, six thread inserts, a cylinder leak detector and a very helpful “how-to” video. All this, combined with the great support you’ll get from www.denlorstools.com is just about all you’ll need to successfully complete the job.
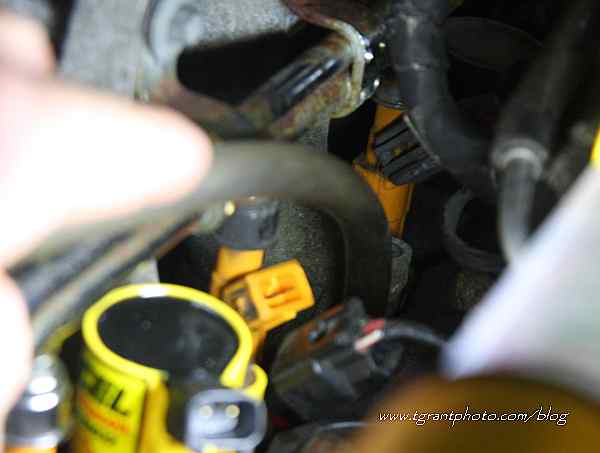
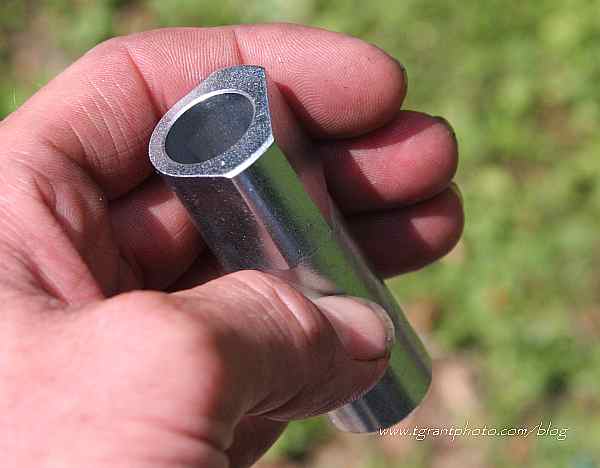
As you’ve probably noticed, the under hood engine area is dark and very cramped. On the Ford vans, space is even more restrictive. This is where the CalVan tool shines. The special insert slips into the spark plug hole and provides a foolproof guide for the drill bit and finally the tap. You don’t have to be looking directly down the spark plug hole to work on it, just clear the area above it so you can get the air ratchet in.
The “how-to” DVD that comes with the CalVan kit is very helpful, although it’s all done in a brightly lighted workshop. Your job will be much trickier. Try to clear the area above the engine as best as possible. Remove the plastic wire loom protectors, tie back floppy wires and hoses and disconnect the fuel injector and plug wires that you’re working on. Follow the step-by-step instructions on the video to a “T”. Take your time and proceed slowly. When you get to the drilling step, don’t worry if the drill doesn’t cut through the head like butter. If it sticks, slowly back it out, remove the drill bit, clean it up, oil it again, and put it back in to continue drilling.
When I got to the tapping stage, my heart sank when the tap appeared to get stuck. That’s when I abandoned the air ratchet, and slowly backed the tap all the way out. Clean it off, re-oil it and then screw it in with your fingers to catch the new threads. This time use a hand ratchet with a little downward pressure. It’ll go very slowly, and at times you may wonder if it’s going anywhere. Just keep an eye on the marker line at the top of the tap. When that reaches the top og the spark plug hole you’re done! Back the tap out and get ready for the final trickiest step.
Removing the metal shavings from the cylinder
This is the most important part. You need to get the shavings from the drilling completely out of the cylinder. Take the air nozzle that you’ve modified with the attached plastic tubing and stick it way down in the cylinder. Caution – make sure to wear safety glasses! Wrap a shop rag around the top of the spark plug hole and blast away. The shop rag will stop shavings from flying all over the place. Shake it out and keep repeating the procedure.
The video boresope
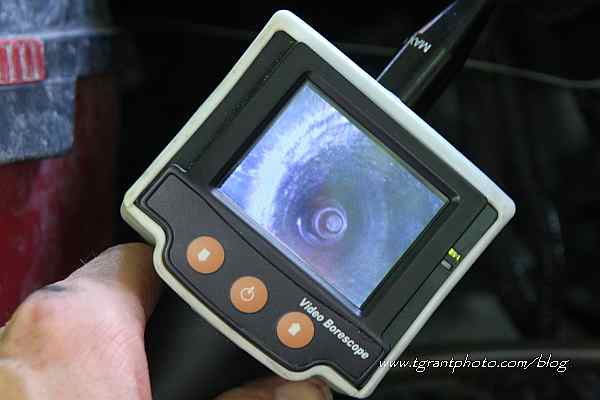
This is where Lil’ Geek (my pet name for my video borescope) is used to take a look inside the cylinder. There’s lots of video inspection tools on the market, ranging from $99 all the way up into the thousands. But guess what? The $99 hand held video inspection scope from www.thinkgeek.com turns out to be the best and the most practical! Who would have thought that a company that makes upscale toys for office executives would carry such a handy tool! It’s very practical, with a 10mm width, 35” snake and an easy to see 2.5” viewfinder. This certainly is no toy, and it comes packaged inside a rugged plastic carrying case which includes a retrieval magnet and hook. The video borescope quickly became one of my favorite shop tools!
In the CalVan “hot-to” video, the inspection of the cylinder seems to go quickly. However this was not true in my case. Perhaps the video borescope was “too good” and showed me all the little things that are better left unseen. It took over an hour of careful blowing, then inserting a thin shopvac hose, then more blowing. At one point I removed the shop rag, and I could still see shavings coming out when I blew compressed air into the cylinder. At the end of it all, a few teeny shavings remained, jammed between the edge of the piston and the cylinder wall. These looked to be about 1/8” long and about as thick as a human hair. Repeated attempts to remove them failed, so I opted to live dangerously and continued on to the final step of the repair.
Installing the insert
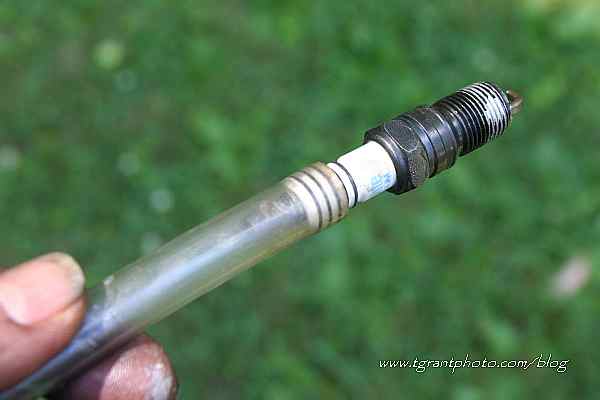
Get your new spark plug ready (make sure it’s gapped correctly!). Although there’s varying opinions about using anti-seize on spark plug threads, I decided to put a light amount of anti-seize on the threads. Using your fingers, screw the spark plug into a new insert. Then mix up a small amount of J-B weld and apply it to about a ¼” area of the lower threads. This will work it’s way up as it’s screwed in, so don’t overdo it! Then attach an 8” length of flexible poly tube to the top of the spark plug, and carefully aim it down the hole. This is the best way I’ve found to start spark plugs into the threads correctly. By using the tubing to tighten the plug into the first few threads, you don’t run the risk of cross-threading. When the plug seems snug, plug off the poly tubing and slide in your 5/8” socket and torque to manufacturer’s recommendations. In most circumstances, a torque wrench won’t fit way back in the engine of a van, but if you’ve done enough car repairs, you probably have a good enough feel to complete the necessary tightening.
It’s almost done!
Try to resist the urge to fire up the engine, and give the J-B weld about 15 hours to cure. This will give you a chance to check each and every plug for correct torque. After checking, I found 5 plugs that were way too easy to unscrew, and four that seemed like they were frozen in place. All the plugs that I was able to remove appeared to be in top shape, so I opted to leave the 4 frozen ones in place (There’s other issues with certain Ford sparkplugs breaking off, so I didn’t want to spit into the wind on this one!)
After all your spark plugs have been seated, and you’ve called your friends to tell them about your truck’s close encounter with Death, it’s time to relax! The worst is over, but be sure to wait until the next day so your J-B weld can set up.
The next morning you’ll turn the ignition key and a big smile will form on your face as your engine purrs like a kitten! After the repaired engine was running, I realized that my engine no longer making a “ticking” noise (this was the warning noise of a loose sparkplug, a noise that I’d somehow slowly become accustomed to!)
The final step in the repair is simple but important. Run the engine for about ten minutes, then change the oil & filter. This will hopefully remove any debris that might have worked its way into the oil system.
As a footnote 3 years after the repair, it’s now been 5,000 miles since this repair was completed and my Ford Triton V-10 engine still runs like new! I’m hoping that occasionally checking all the spark plug torques will help ward off any future disasters!
Disclaimer: Repair tips in this article are designed for informational purposes only, without warranty of any kind, in no event shall the author of this site be liable for any consequential, incidental or direct damages sustained in the course of using the information in this article.
Photos showing some of the repair techniques (click on any photo for a larger view):
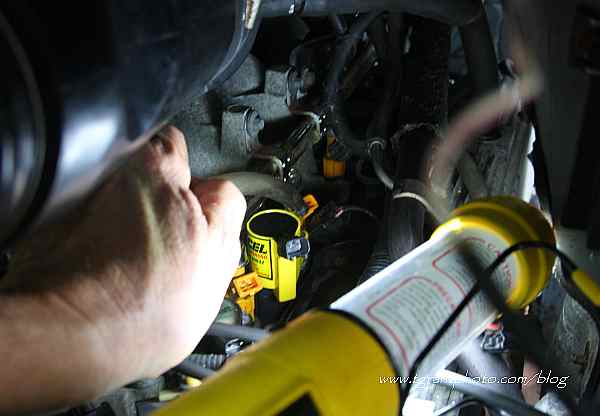
It’s dark and cramped under the hood! Here I use a small neoprene tube attached to a Shop-Vac to suction out the shavings. It’s very important to get that engine cyclinder cleaned out after you drill and tap the sparkplug threads
”Lil Geek”, at $99 it’s my “not-too-expensive” borescope. Poke this baby down into the cylinder as you look for shavings. It’s a long task and took me about 2hrs. to get all the visible shavings out. Make sure you do a couple of oil changes the week after the repair, this gets any remaining grit out of the engine. The image on the borescope shows the top of a sparkplug, you’ll get a good view of the cylinder when you’re down inside!
This is what happens to the spark plug coil when the spark plug gets ejected, or “blown-out”. When this happens gasoline from the fuel injector could have sprayed onto the hot engine block causing a fire…..I was lucky!
Flexible tubing attached to the new spark plug makes it easier to get a start when you’re screwing it it.
The Cal-Van Kit. It contains most everything you need for the repair.
The jig inside the Cal-Van kit fits into the engine block. This ensures that when you drill and tap everything lines up properly.
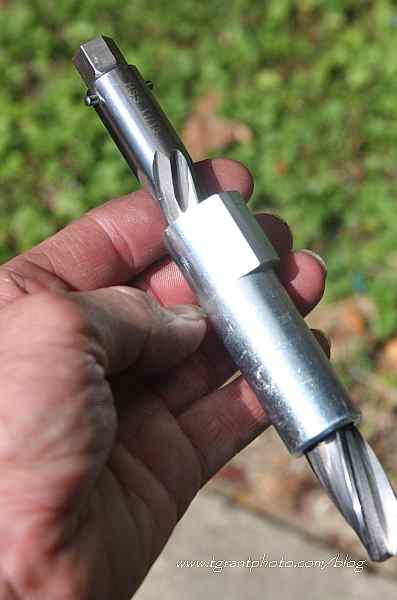
CalVan drill bit inserted into the jig. It’s a well made tool and doesn’t allow you to drill at an “off angle”
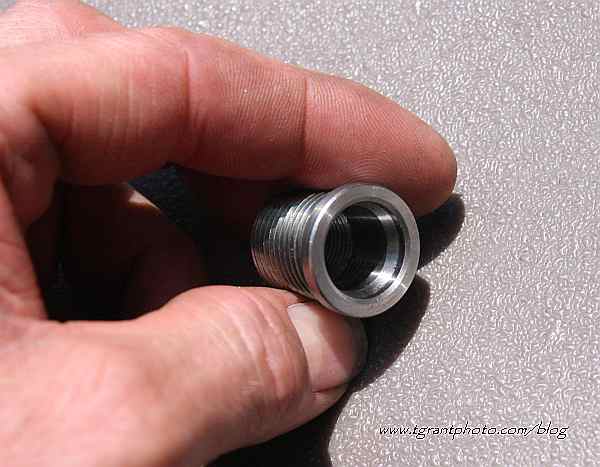
The all important Cal-Van threaded insert. To my mind this makes the repair better than the orignal factory job.
The new (yellow) sparkplug coil installed at the end of all the repairs.
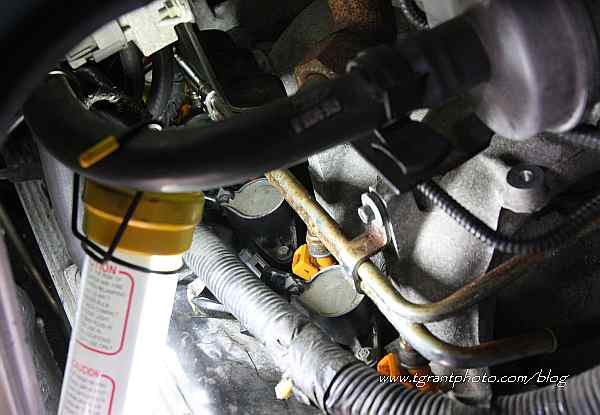
Another shot showing the other side of the engine block. Nothing’s easy to get at under the hood of the Ford E-350 van. But the Cal-Van kit helps make the job a whole lot easier.
If this article helped you, please consider giving a “like” to TGrant Photo on Facebook! Thanks!


 HARRY BROWN is a gritty and realistic crime drama that re-visits the familiar territory of the DEATH WISH films. Michael Caine gives an engaging performance as Harry Brown, a British 70′s-something pensioner, besieged by a neighborhood of drug dealers, addicts and thugs. Recently widowed and all alone, save for one friend, we can’t help but sympathize with his plight. It’s when Harry’s best friend is mugged and brutally stabbed to death that he becomes a vigilante. In short order Harry is dispensing his own form of justice around his housing estate.