


1 Feb
Magnavox ZC320MW8B/F7 DVD recorder – Review
Author: Tom GrantI’ve been waiting to transfer my family VHS tapes to DVD, looking for a recorder that would make the whole process easy. The Magnavox ZC320MW8B/F7 DVD recorder at Walmart turned out to be the answer! At only $98.00 it turns out to be a great deal for dubbing directly to DVD!
I’m already quite familiar with the Magnavox 2160 & 513 line of HDD/DVD units, having owned a couple myself. This stand-alone DVD recorder seems to operate & burn DVD’s with the same ease, the main difference being that there’s no internal tuner and no internal HDD. When you record you’ll need to use an external video source such as a VCR, camcorder or external TV tuner.
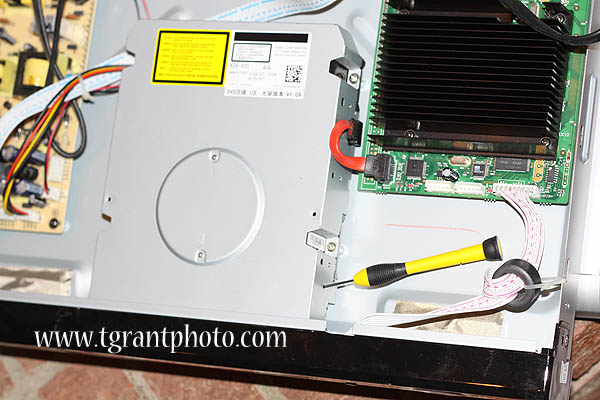
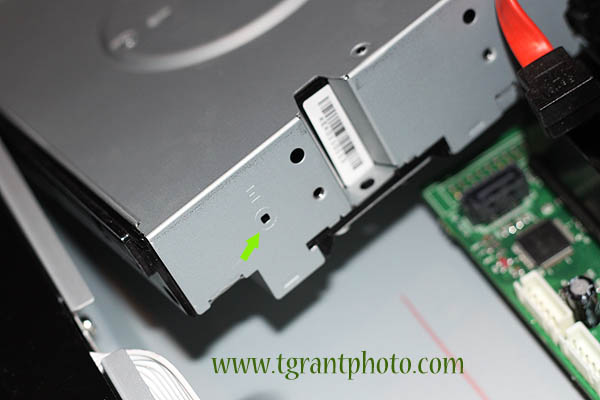
A quick look inside the unit reveals a DVD burner assembly that looks similar to the one in the Magnavox 2160 (although I can’t guarantee that it’s identical). It’s well made, and in my experience it burned both DVD+R and DVD-R’s with ease. Both formats play back reliably on most modern DVD players. I’d be remiss if I didn’t mention that you can considerably extend the life of the DVD burner by using 8x blank DVD’s instead of 16x. The laser runs at lower power when it burns to an 8x disc, lengthening the life of your recorder.
The Magnavox ZC320MW8B/F7 comes with a remote control that’s similar to the 2160 & 513 Magnavox remotes. A few buttons that weren’t needed are missing, so the remote may look somewhat naked by comparison. Operation of the recorder is quite straightforward, and if you’re familiar with the 2160 or 513, this DVD recorder operates in the same manner.
Direct dubbing is very simple, insert a blank DVD, on the remote press the REC MODE (to select recording speed), then when you’re ready hit REC. For extra convenience, once you’re recording, you can press the REC button several times to choose the time to shut off the recording. When you’re finished recording the Magnavox automatically creates a title menu showing program length and record date (you can also add a still frame photo from the recorded movie to the menu title). Tip: if you don’t enter a date or time into the DVD recorder’s memory, it will leave these things blank when it burns the title menu on the DVD. Also, if you’re direct dubbing, set your burn length time to exceed the amount of time on the disc you’re burning and you won’t even see the “empty space” title box in the menu. Finally, and of paramount importance, be sure to FINALIZE the completed DVD so that it’ll play back on other DVD players.
The particular unit I bought was the last one in stock, and since the unit had been returned the store kindly gave me a discount. Over time I’ve seen several Magnavox boxes at Walmart that look like they made it to someone’s home before being promptly returned. I believe some consumers are confused about how to program these units. More importantly, they don’t read the instructions explaining how the discs have to be finalized before they’re played back on other DVD players. If you can spend ten minutes to read through the instructions you’ll save yourself a lot of frustration. By the time you’ve burned a couple of discs the whole process will become second nature!
All in all, the Magnavox ZC320MW8B/FZ is wonderful buy at only $98.00. Great for direct dubbing or timer recording from an outside video source. It’s a wonderful addition to your video hardware collection ![]()
Comments Off
Filed under: Video Equipment