How to clean reel-to-reel VTR video heads
Note: This article is for informative purposes only.
We are not responsible for any damages caused by your attempt to clean
your VTR's video heads. Never touch a moving video head drum.
This article refers to most 1/2" reel-to-reel videotape recorders such as the Sony AV-3600, AV-3650, AV-3400, CV-2000, CV2200, CV-2600 and with minor differences, various other models from other manufacturers.
If you own a reel-to-reel video tape recorder (VTR), you'll be cleaning the video heads quite often. Unlike VHS or Betamax tapes, reel-to-reel video tapes are out in the open, not protected by a cassette housing. You have to handle the tape to thread it. You have to handle it again to get it ready to rewind. If you stop playback halfway through a reel, the tape's just sitting there, ready to be contaminated by curious fingers. All this touching of the tape damages it with the various oils and contaminants on our fingers. Furthermore, the first few feet of a well used tape develops lots of wrinkles from continual threading and handling. The wrinkles allow oxides to flake off the tape and clog the video heads.
Although the Sony manual outlines a video head cleaning technique, our method (outlined below) gives you much better control over the process.
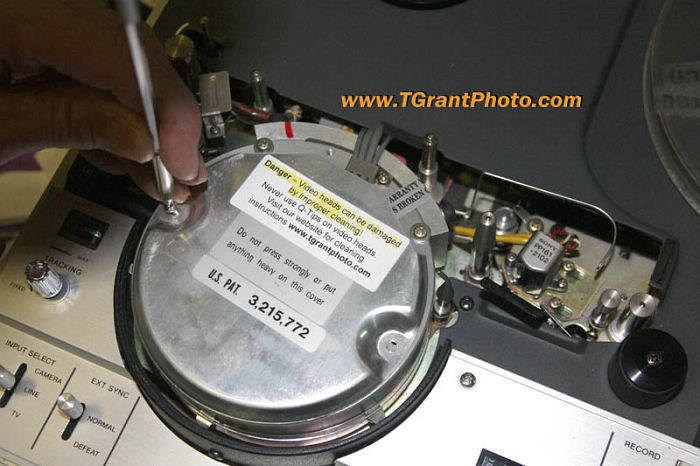
The first step is to remove the plastic cover (not shown) over the video heads, then unscrew the two screws that secure the metal drum cover.
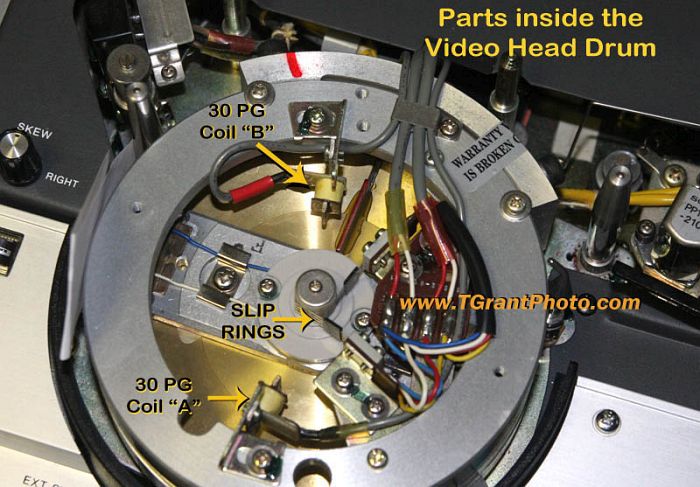
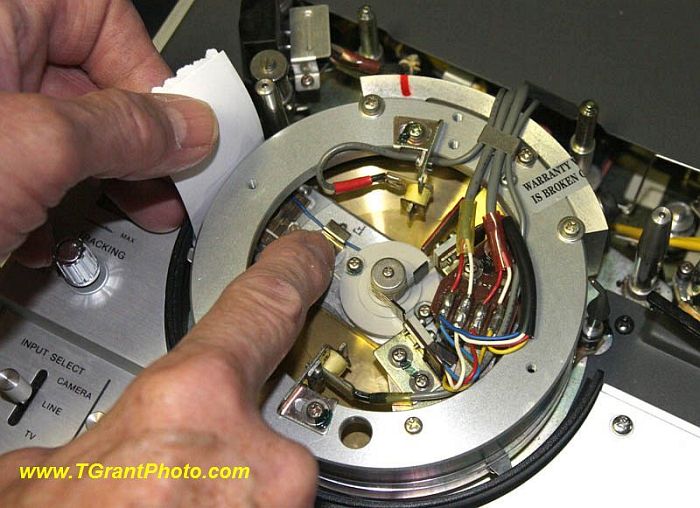
The photo below shows some important parts inside the head drum. Notice the two 30 PG coils and the slip ring brush assembly. While cleaning the video head you don't want to touch or bend these parts!
Caution! Never touch the video head tips directly. Never clean them with a cotton swab. Never apply any vertical cleaning movements to the head tips as it may break or damage them.
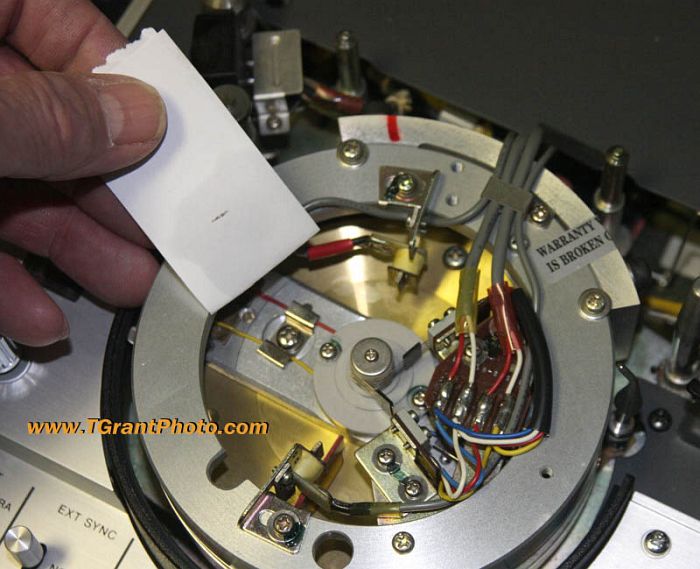
You'll need some 91% isopropyl alcohol and some pieces of typing paper. 91% isopropyl alcohol is available at most drug stores, I recommend it because it contains less water and it evaporates more quickly than the common 70% isopropyl alcohol. Cut the printer paper to 2" by 6", then fold it over once. Moisten the paper with the alcohol (see photo below)
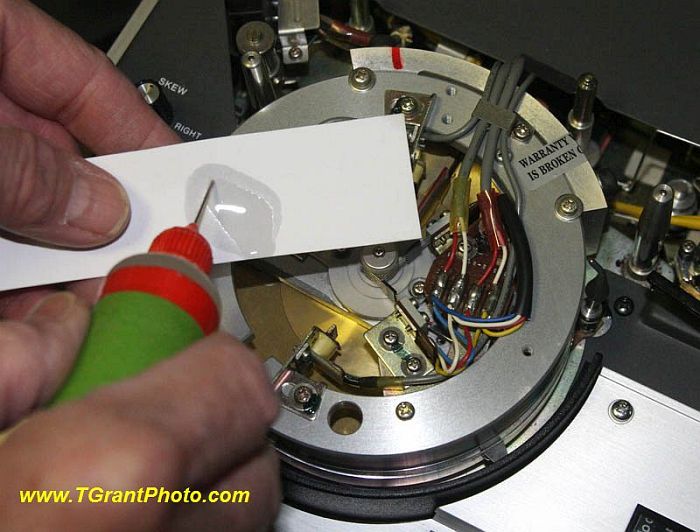
With the power to the VTR turned "OFF", place your finger over the Philips head screw (between the blue & white wires shown in the photo). Carefully manipulate the video head bar so one of the video heads is pointing to the left. Be careful not to touch or bend the 30 PG coils or the slip rings. With your left hand, position the moistened paper over the left pointing video head. (see photo below)
While holding the alcohol moistened paper with your left hand, use your right hand finger to move the video head back and forth, in 1/2" motions, while keeping light pressure with your left finger on the head. Keep the paper staionary, do not move the paper up and down. Only apply gentle pressure with the cleaning paper. You should feel a small "bump" as the video head passes under the paper. Move the video head back and forth a few times.
Inspect the paper. If it has a black streak (see photo below) you need to continue cleaning with another clean piece of alcohol moistened paper. Continue until the paper no longer shows any black marks.
Once the paper is clean, carefully manipulate the video head bar so that the second video head is in the left position. Clean it in the same manner as outlined above.
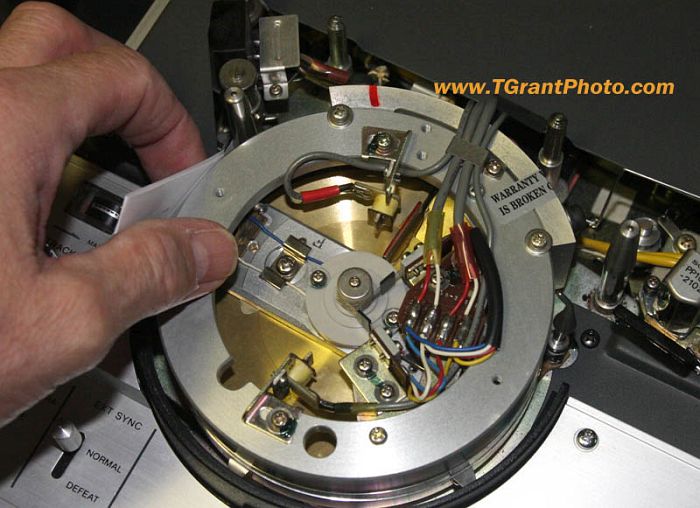
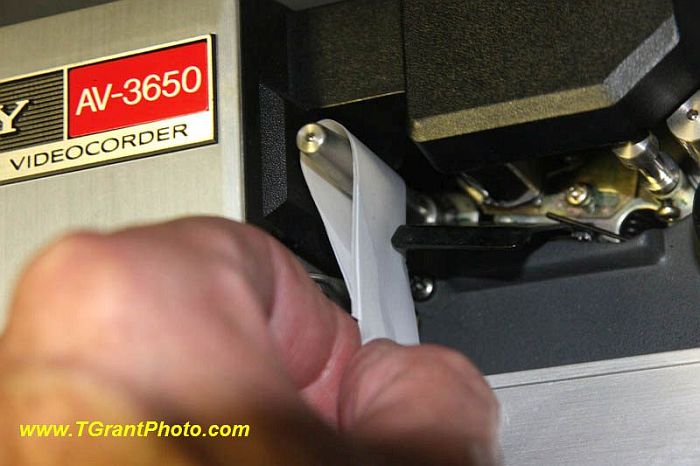
Your video tape guides can also be cleaned with the isopropyl moistened paper (see below)
Don't forget to scrupulously clean the rest of the tape path using cotton swabs, but never use swabs directly on video heads. A small wood toothpick is also ideal for cleaning the edges of the head drum channel.
If you continue to get black residue on your tape path it's probably because the tape you're trying to play has "sticky shed syndrome". Follow our advice for baking sticky tapes here.
~ Tom Grant May 2017 TGrant Photo LLC.
Disclaimer: All the information on this website is published in good faith and for general information purpose only. TGrant Photo LLC does not make any warranties about the completeness, reliability and accuracy of this information. Any action you take upon the information you find on this website (www.tgrantphoto.com), is strictly at your own risk. TGrant Photo LLC will not be liable for any losses and/or damages in connection with the use of our website.
This article is copyright TGrant Photo LLC. Copying or use on another website is prohibited.