Reel-to-Reel videotape tips & FAQ
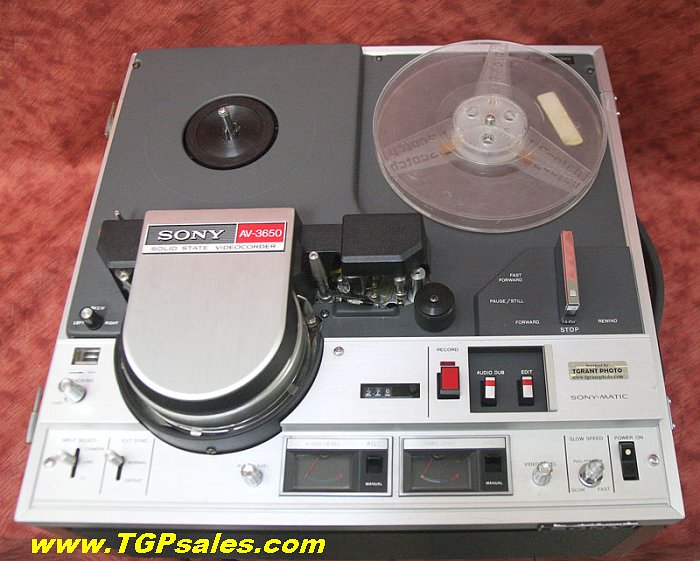
Most 1/2" reel to reel videocorders (VTRs) were manufactured between 1965 and 1971. By now, most extant videotapes in this format exhibit mold and "sticky shed" syndrome. Transferring reel to reel videotapes to digital is now, typically, a formidable task. Here's some tips that will help with your transfers. This article refers to Sony AV-3600, Sony AV-3650, Sony AV-8650, Sony CV-2000, Sony CV-2600 and many other 1/2" reel video recorders from the period.
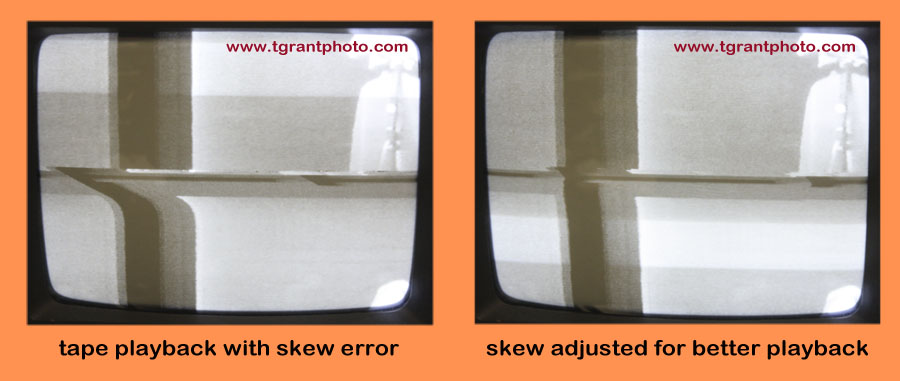
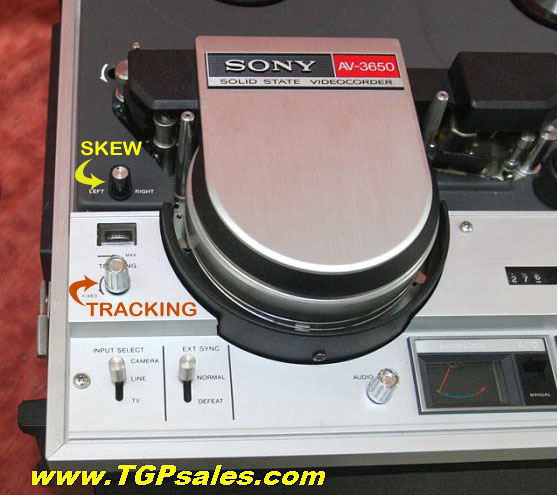
Skew - Use the "skew" adjustment knob to vary the back tension as the tape plays. It's very helpful to monitor the tape playback on a pulse-cross monitor. Adjust the skew for the best placement of the sync (see photos)
Sticky tapes - If tapes freeze during "play" or "fast forward", they are probably exhibiting "sticky shed" syndrome. Follow our advice for baking tapes, then clean the tape path thoroughly and completely before playing a tape again.
If the tape you are playing has sticky shed syndrome, the pulse cross will look quite abnormal since the tape is dragging as it passes through the tape path. The pulse cross will bend to the left (see photo below) Unlike the above playback example, the skew control cannot correct for sticky tape error. The best solution is always to try baking the tape.

Tracking - In addition to a skew control, some VTRs have a "tracking" control knob. Adjust the "tracking" to achieve the best, most stable, picture. On VTR's with tracking meters, adjust the control for the highest meter reading. If you have access to a pulse cross monitor, roll the tracking noise into the black bar of the pulse cross.
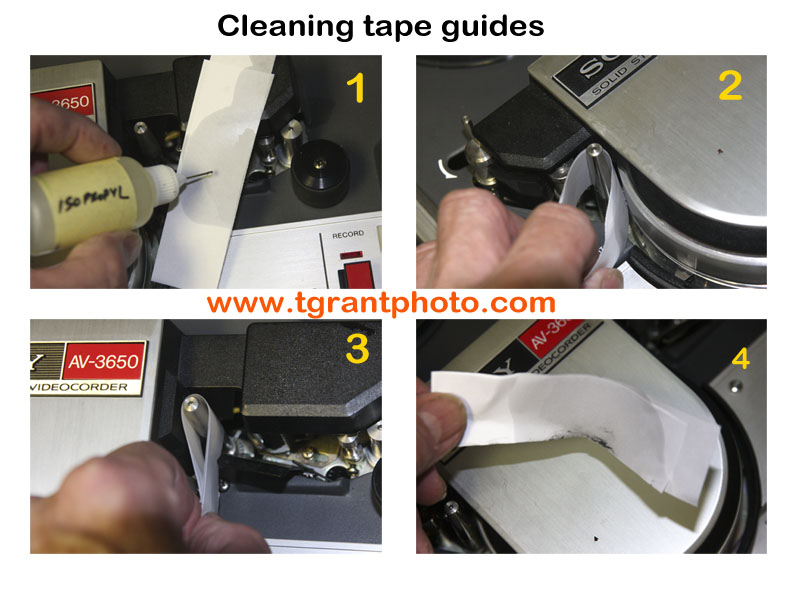
Cleaning the tape guides - Old tapes and "sticky tapes" will quickly place deposits on the tape guides and video head drum making playback impossible. You need to clean these frequently using 91% isopropyl alcohol. If a tape you have baked still sticks during playback, bake it again for another 8 hours following our instructions. Scrupulously clean the entire tape path. To clean hidden areas of the tape guides, cut a 1" x 6" piece of typing paper. Wet the typing paper with the isopropyl alcohol. Then wrap it around the main guides (see photos below) and work it back and forth to clean the stickiness from behind the tape guides. Allow 15 minutes for the alcohol to evaporate before playing the tape. You may have to repeat this process several times if the tape starts to stick again during playback. If the tape continues to stick, bake it again.
Use a Time Base Corrector: Sony reel-to-reel VTR's manufactured between 1965 and 1971 were designed to play back on companion Sony TV monitors. These monitors had a short time constant which effectively disguised many of the playback errors which typically appeared as flagging or bending at the top of the picture. During the 1970's many consumer TV sets had to have their circuits modified so that they could play back reel-to-reel video tapes correctly. Today, to properly transfer a reel-to-reel videotape to digital, you need run the video output of the VTR through a time base corrector. This stabilizes and purifies the video image so that it's suitable for digital capture.
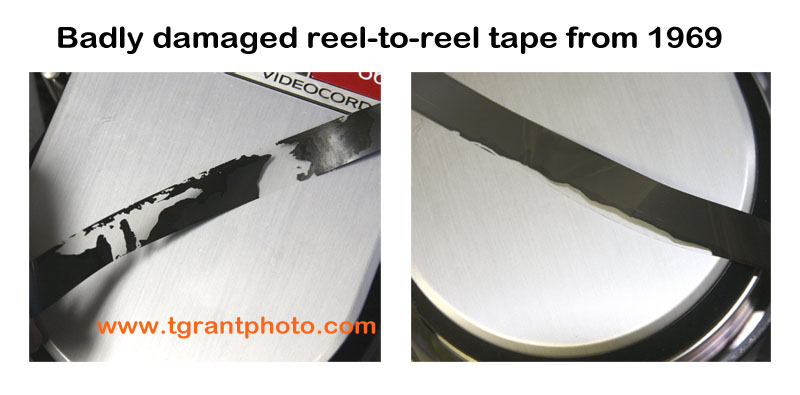
Always monitor the tape when it's in "rewind" or "fast forward" - You never know what can happen with an unknown tape. A tape can play back properly but can have a certain spot that's sticky. If the tape suddenly sticks during rewind it can slip inside the head drum and destroy the spinning video heads!
The photo (below) shows damage that can occur when the tape sticks to itself. This reel of 1/2" tape had been stored since 1969. Filled with mold growth and stickiness, the last portion of the tape near the hub was a mess. During fast-forward, a damaged tape like this can suddenly break your video heads! Be sure to carefully inspect your tapes before playing. Be vigilant and watch your VTR when your tapes are fast forwarded!
Dropout problems - Older video machines often didn't have very good dropout compensator circuits. On the old Sony reel-to-reel VTRs it's typical to see horizontal flashes, or dropout, as the tape plays. This represents damaged or missing magnetic oxide on the tapes. Videotape was very expensive back in 1970, about $20 (in 1970 dollars) for a 7" reel of 60 minute tape. To save money, universities and colleges typically kept erasing and reusing their video tapes. Because of this, many old videotapes often exhibit a tremendous amount of dropouts.
CV format versus AV Format 1/2" reel-to-reel videotape -
The CV format appeared early in 1965, introduced by Sony as an alternative to the larger and more expensive videotape formats. Weighing 45 lbs, the CV Videocorders were barely portable, however they quickly became popular in business and academic settings. The Sony CV format used only one of the two video heads to record. During playback both video heads played back the same line of recording twice, giving a resolution of about 220 lines. A smaller version, the Sony DVK-2400 videocorder was also available. To keep weight of the unit to a minimum, It didn't have a motorized rewind function, a manual crank was used for rewinding. Total recording time was 20 minutes on a 5" diameter reel. CV format videocorders include the Sony CV-2000, CV-2100, CV-2600 and others.
AV (EIAJ) format videocorders - In 1970 the AV series Sony videocorders were introduced. They featured standardized EIAJ recording format and used both video heads for a resolution of 300 lines. The addition of a tracking control helped fine tune playback of tapes that were recorded on other EIAJ format machines. Typical AV VTR models are the Sony AV-3600, AV-3650 and the portable AV-3400. Various other EIAJ format VTRs using the same technology were also produced by several other manufacturers.
Occasionally we're asked how to distinguish between CV and AV format tapes, since they both physically look alike. Generally speaking, if a tape was recorded before 1969, and you're sure of the actual recording date, it's probably the old CV format. The original CV tapes have more of a reddish copper color to the tape, while newer tapes from the AV (EIAJ) era have a dark, blackish coating. That being said, it is possible to record over an old CV tape with the EIAJ format. For a definitive answer, it's always best to play back the questionable tape to determine its format.
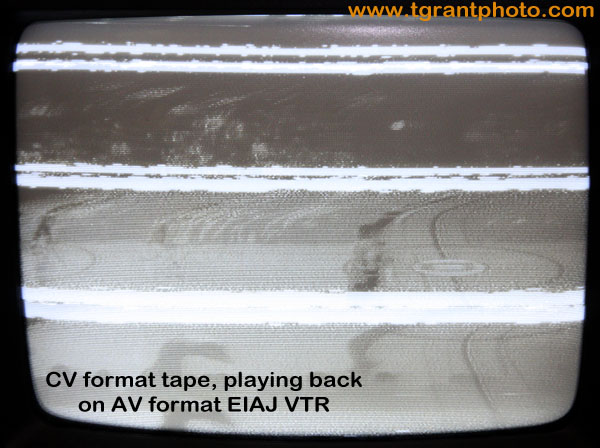
If you have an AV series VTR, such as the Sony AV-3650, a CV tape won't play back properly. The audio plays fine, but the picture looks like partially clogged video heads (photo below)
Playing back tapes on a reel-to-reel VTR -
When changing playback modes (ie: FF to PLAY), make sure to turn the VTR's function knob quickly and completely to the next function. Slowly turning the function knob between positions sometimes doesn't activate the brake mechanism fully. When threading, take care to make sure that the auto shut-off wire (if so equipped) is positioned properly behind the tape. If the tape is threaded too loosely, the auto-shutoff wire might not activate the motor. Also, make sure that the tape is not dropping off the feed or take-up reels before engaging PLAY. After threading and before playing a tape, place your left hand on the feed reel and your right hand on the take-up reel. You should be able to move the tape back and forth across the stationary head drum. Tapes that stick or bind during this "test" are often sticking to tape residue on the head drum or the erase head. Always clean the tape path scrupulously before starting to play a tape.
~ Tom Grant TGrant Photo LLC.
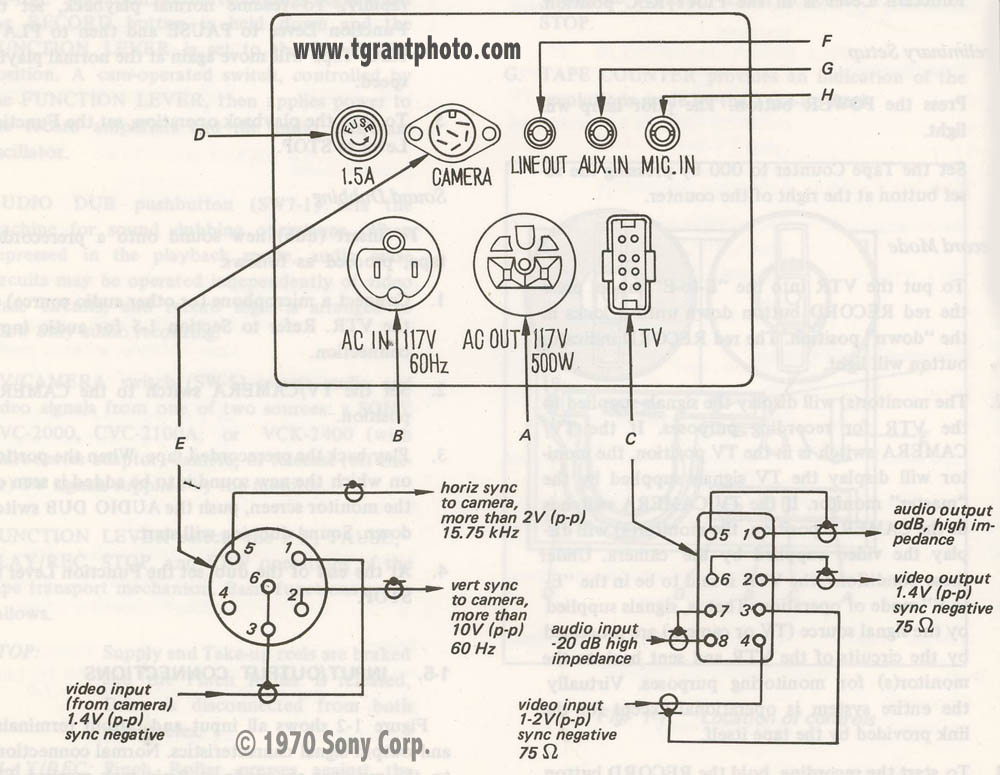
Typical inputs & outputs on a Sony CV videocorder
The "TV connection" shown below, was a sort of HDMI cable of its day.. with much lesser picture quality! All the audio and video connections were housed within the one connector. The pin-out on these is the same for reel-to-reel video recorders and U-matic machines. For most purposes, you'll just need to access two sets of connections, the audio out and the video out.
You can make your own hookup cable by soldering the two wires at one end of your video cable to two short sections of a paper clip. You'll need to do the same for the audio cable.To make the connections more durable, fashion a small plastic form, suspend your home-made connections, then pour in some epoxy. After it's dry, carefully push the home-made pins into the socket on the back of the VTR.
~ Tom Grant TGrant Photo LLC.
Note: This article is solely for informative purposes only.
The above content is copyright TGrant Photo LLC.. Copying or use on another website is prohibited.
Sony Corporation, CV-2000 Product Design, https://www.sony.net/Fun/design/history/product/1960/cv-2000.html (accessed August 15, 2017)
Lab Guy's World, 1968 Sony CV-2600 - Simplified 1/2" Skip Field Videocorder (accessed August 15, 2017) http://www.labguysworld.com/Sony_CV-2600.htm
Sony Corporation (1968), Sony Service Manual CV2100/2200 Videocorder Decks 9-966-127-01
Sony Corporation (1971), Sony Service Manual DVK-2400 Portable Videocorder
Sony Corporation (1970), Sony Service Manual CV-2600 Videocorder
Experimental Television Center, Sony DVK-2400/VCK 2400 Battery Operated Videocorder/Camera Ensemble (accessed August 15, 2017) http://www.experimentaltvcenter.org/sony-dvk-2400vck-2400-battery-operated-videocordercamera-ensemble
Texas Commission of the Arts (2004), Videotape Identification and Assessment Guide (accessed August 26, 2017) http://www.arts.texas.gov/wp-content/uploads/2012/04/video.pdf